
or, a first timer’s journey messing with static sites.
What is Hugo?#
I’ll just link them for you and save you the trouble of having to read my own paraphrasing. I can’t resist, however: it’s essentially an open source service that helps you generate static websites. Documentation, blogs, portfolios, you name it. I was inspired by Zoe’s blog and wanted to create my own.
The Goal#
This blog post is essentially a letter to my past self. If I had this blog post maybe a few hours earlier, I could’ve saved myself a lot of headache.
Installation#
Currently, I’m working out of my Windows PC, so I’ll go over this part assuming you are doing the same. If not, refer to this site.
- Ensure that Chocolatey, a windows package manager (similar to brew on MacOS or pacman on Arch. I do not use Arch btw). Same thing with Winget
- Funnily enough, same thing with Powershell 7
- Run this command, but in Powershell 7:
choco install hugo-extended
Site Creation#
Yay! Everything has been installed and is ready to go. I use VS code just because the files are not as numerous to where I would need to use neovim or anything, but use whatever you’re comfortable with. Just make sure to use Powershell 7 as your shell here on out.
Check to see if Hugo was installed correctly with hugo version. At the time of this post, it should be around 0.129.0.
Here comes the tricky part. To be fair, it was only tricky for me simply because I already had the makings of a barebones Next.js website, but I was tired of the learning curve. I’ll definitely come back to it one day, but Hugo just provided an easier option.
Create a repository on GitHub and name it “username.github.io”. (Does the period go inside the quotations or outside? It looks better inside but logically it feels better outside). Clone into this repo. Now, here’s where the fun begins.
Navigate into the repo you just cloned and run this line:
hugo new site example.com
Now, we’ll do a bit of configuring here.
mv \example.com\* .
mv \example.com\.* # should be redundant, but eh why not
rmdir \example.com\
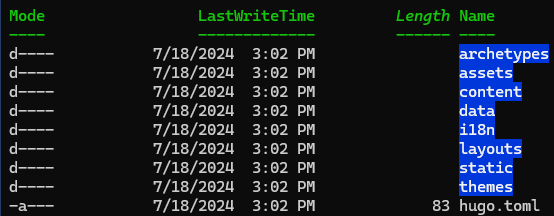
If you look at your directory now, it should look like this
Great! Now, we can set up your hugo.toml as you wish. Add a title param in your hugo.toml file (anywhere inside works, as long as it’s not part of a param):
title = Kushal Vajrala
Explore the different configs you can use. From here on out, it’s just a matter of finding out your favorite theme: install and run for it!
The very adventurous will probably stop reading here, and go tinker on their own now that things are set up somewhat. However, I’m not totally sure that when I was working on this earlier. Let’s use the theme that I’m using for this tutorial, hugo-coder. I was able to set up my stuff pretty fast with this clean, minimalist theme.
I would really rather not rewrite the download instructions they’ve so kindly given, so make sure you read and implement carefully. I recommend installing it as a git submodule.
Showing off your literary masterpieces#
Now, here’s where the fun (really, the writing) begins!
Assuming that you followed their example config setup, let’s go into making posts! Your content directory should have a posts directory within it. If it doesn’t, go create that.

Ensure that in your hugo.toml file, you have this:
[[menu.main]]
  name = "Blog"
  weight = 1
  url  = "posts/"
[[menu.main]]
  name = "About"
  weight = 2
  url  = "/about/"
I changed mine around a bit, because I just wanted one singular about page. For now, run the following lines:
hugo new \content\posts\hello-world.md
hugo new \content\about.md
You’ll see that the files already come populated with some stuff in between some +++. These are essentially metadata that the theme utilizes to showcase and tag your posts. The prepopulated stuff can be found in the archetypes folder. Kudos to you if you explored a bit and found that out. It uses some regex to properly capitalize and figure out what to title your article. Fill the created files out to your desire.
Now, run
hugo server
and navigate to the localhost link that it gives you! Ta-da! Your website it almost done! If you want to deploy it with GitHub pages like I have, go through the following steps:
- Push all of your changes and note which branch you used
hugo versionto see which version of hugo was installed- Follow the instructions here
- Navigate to your website, and there you go! It’s all done.
Final Thoughts#
I hope this helped you out! If you have any questions, feel free to reach out to me!